SensorConnector for Windows
First-Time Procedure
Download, Install, Run and Test

- Download and install the Windows SensorConnector software.
- Plug a probe into your computer and run SensorConnector. (Click Start > All Programs > Concord Consortium > SensorConnector, or search for 'SensorConnector' and click its icon to start.)
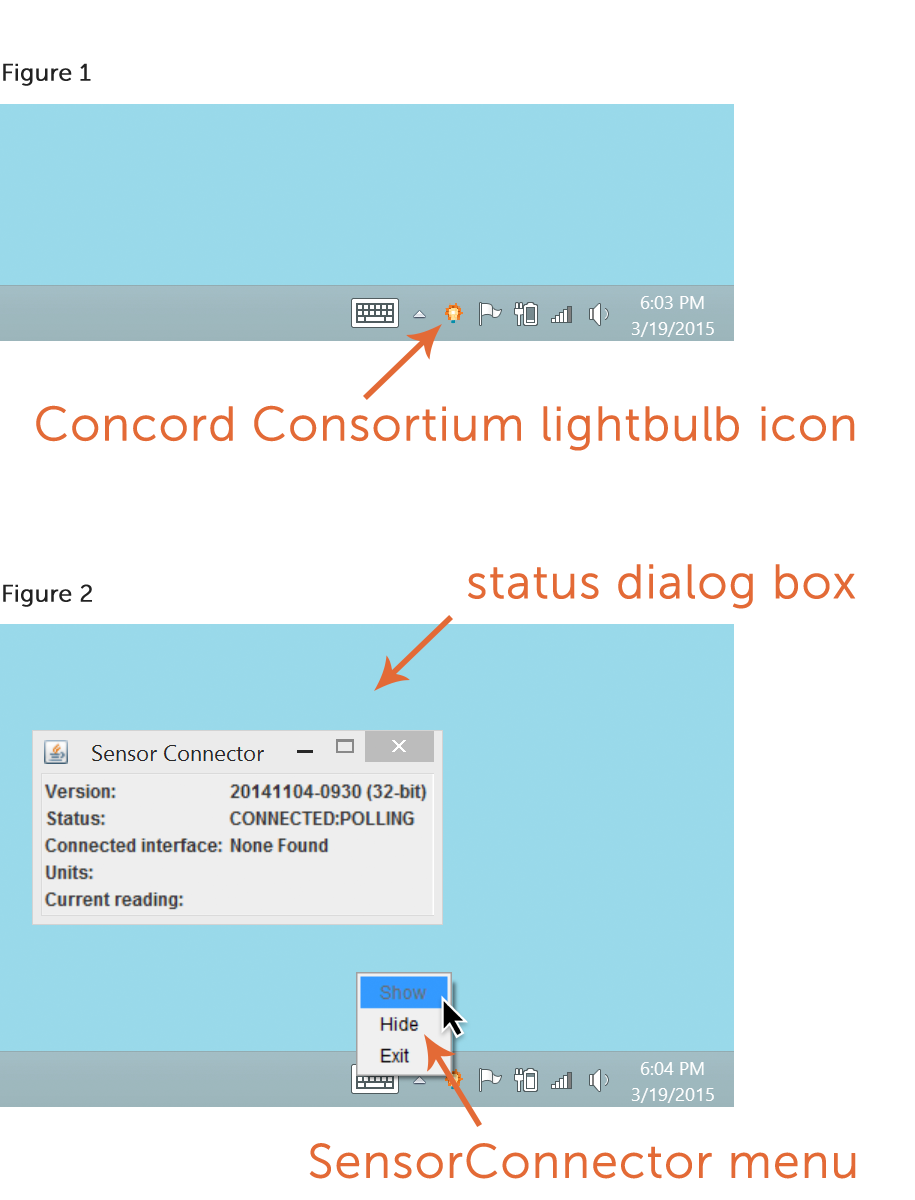
When SensorConnector is running, a Concord Consortium lightbulb icon will appear on the taskbar or on the window that shows hidden icons on the taskbar (figure 1). Right-click the icon for a menu to show or hide a status dialog box of connected probes, or to exit SensorConnector (figure 2). If probes are plugged into the computer, the status dialog shows their type and current reading. - To test if SensorConnector is working, use the interface below for data collection (probes required).
Sensor Connector Web Interface
Try embedding the sensor interactive in CODAP, our free online data analysis platform.
Daily Procedure
Just Run SensorConnector (or Don't)
Before working on Concord Consortium probe-based activities, simply run SensorConnector. If SensorConnector is not running when the probe page is loaded, a pop-up dialog from your browser will appear asking permission to run SensorConnector. Either allow SensorConnector to run from this dialog, or start it manually.
Configurations
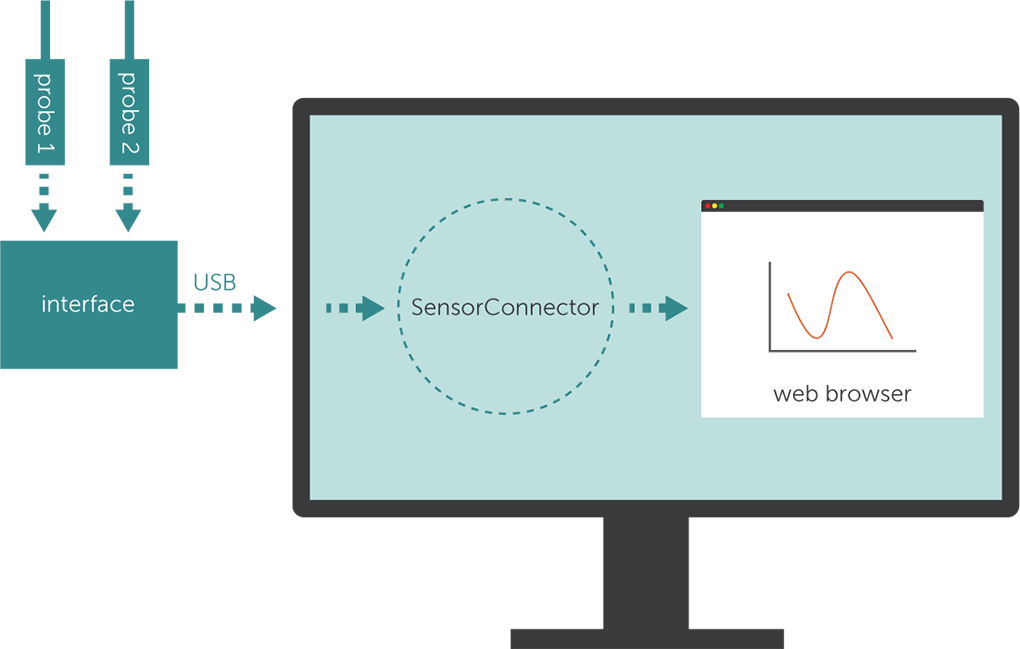
The SensorConnector supports up to two probes simultaneously. When using two probes they must be connected through an interface such as the Vernier LabQuest or the PASCO PowerLink. Data from one probe at a time may be collected from probes that plug directly into the computer, such as GoMotion, Go!Link or UsbLink probes.

